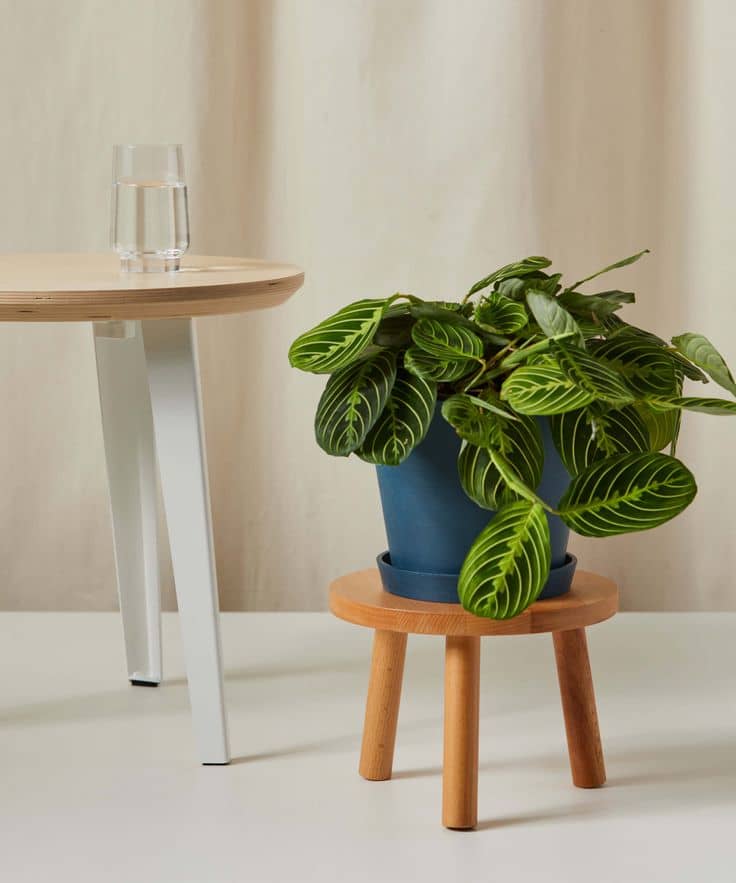
Indoor gardening is not just about bringing plants into your home; it’s about creating a controlled environment to meet the specific needs of your plants. Indoor gardening is an extremely beautiful enhancing method where plants thrive in an indoor space, which could be a house, apartment, or office. This gardening method is particularly attractive in areas with low temperatures, where it helps maintain a green space amidst harsh outdoor weather conditions.
During the winter season, relocating or initiating an indoor garden, primarily in the main living area, can be quite challenging. Limited natural light indoors, indoor temperatures, and the size of the space are all factors to consider when embarking on indoor gardening. However, with the right knowledge and equipment, these challenges can be overcome to create a successful indoor garden.
Understanding low-temperature challenges for indoor plants
How to Maximize Light Exposure

In the cold provision area, the days are shortened, and most often, everyone remains under lower temperatures. Sometimes, sunlight is not visible, and even snowfall occurs. The decreased intensity of light poses the biggest challenge, as it may need to provide more light for photosynthesis. Warm-climate plants may face issues where they can lose leaves due to insufficient light, suffer from stunted growth, and may lose color.
In areas with lower temperatures, sunlight naturally becomes more valuable. Therefore, ensuring that your plants receive the amount of sun they need is crucial. Naturally, where plants can receive the most sunlight is where they should be placed. Choose a location in your home where there is ample sunlight along with natural light. South-facing windows receive the most sunlight during the day, making them ideal spots for your plants. Keep the plants in the sunlight for at least two to three hours during the day. Ultimately, select a location where your plants can receive sufficient sunlight to fuel the photosynthesis process and provide the necessary nutrients for growth.
If there is not enough sunlight available, then using grow lights is advisable. Grow lights are artificially produced lights that provide plants with the necessary spectrum of light and supply the required energy for photosynthesis. LED grow lights may be suitable for these plants, as they give the spectrum of light needed for photosynthesis and serve as a power source.
LED grow lights
Grow tents play a crucial role in indoor plant cultivation, particularly during winter, by providing a controlled environment. They help maintain stable temperatures to keep indoor plants warm and regulate humidity levels, which are essential for plant growth in colder months. The reflective interior of a grow tent maximizes light efficiency, ensuring plants receive adequate light for photosynthesis. Additionally, grow tents shield plants from cold drafts and external elements, creating a stable and secure environment for growth. This controlled environment is ideal for a variety of plant species, promoting healthy growth even in challenging winter conditions.
Humidity

Humidity in the air indicates the amount of water vapor present in the air relative to how much water vapor the air could contain at a given temperature. For example, if the humidity is 50% at 60 degrees Fahrenheit, then the air contains 50% of the maximum amount of water vapor it can hold at that temperature. This demonstrates that humidity levels depend on the measurement of temperature and pressure. Generally, cooler air can hold less water vapor compared to warmer air. This indicates that the same amount of water vapor results in higher humidity levels in cooler air than in warmer air.
If there isn’t adequate humidity in the air, some plants may start curling their leaves downwards or inwards. The leaves of the plants change color and become dry starting from the edges or tips, indicating low humidity issues. This can lead to them becoming brittle and having wilted and dried leaves and flowers. During the winter, it’s crucial to properly adjust indoor heating systems to regulate humidity levels. Many household plants suffer from dry air, where they may experience problems such as leaf browning, leaf curling, and increased susceptibility to pest infestations due to insufficient moisture.
To solve the low humidity problem, it’s crucial for you to understand the amount of water vapor present in the air and the optimal humidity level for your indoor plants. Use a hygrometer to measure the humidity level of your plants.
Most indoor plants thrive within a humidity range of 40% to 60%. If you aim to maintain a healthy indoor garden, it’s essential to ensure that your plants consistently have the optimal humidity level. Different stages of growth require different humidity levels as plants grow fastest at different temperatures, resulting in varying humidity levels. For example, for cannabis plants, the optimal humidity level is 65% – 75% during the seedling stage, 50% – 60% during the vegetative stage, and 35% – 45% during the flowering stage.
Using a plant water tray can be an excellent way to increase the humidity level around your plants. Additionally, you can encourage your plants to flourish by misting them regularly. This is an easy and effective method for improving temperature conditions. Misting indoor plants at the beginning of winter can be particularly effective because the temperature drops rapidly, and maintaining consistent humidity levels is crucial. It’s essential to avoid direct contact between your plants and a petri dish for pests and microorganisms. Ensuring regular communication between the pot and water is critical, as well as regularly replenishing the water. Keeping your plant water tray clean is essential to maintain its effectiveness.
Temperature Fluctuations

Indoor plants rely on you to provide a stable and appropriate temperature environment. Indoor plants can be affected by unexpected changes in temperature. Cold drafts from windows or doors, excessive heat from radiators or vents can exert stress on plants. Indoor plants, especially flowering varieties, should be protected from heat from radiators or vents. Protect them from sudden, drastic temperature changes. Maintaining a stable and appropriate temperature is extremely important for their preservation.
Excessively low or high temperatures can halt plant growth and cause leaf damage, leaf drop, or plant failure. However, most indoor plants tolerate normal temperature fluctuations. Most indoor plants thrive in daytime temperatures between 65°F to 75°F (18°C to 24°C), while nighttime temperatures between 55°F to 60°F are optimal. A good guideline is to keep nighttime temperatures 10 to 15°F lower than daytime temperatures to promote healthy growth, encourage flower coloration, and extend flower life.
A negative effect of Overwatering plants

Many people often make mistakes regarding the amount of water needed for plants. With low light and cool temperatures, plants use less water. Excess water reduces oxygen in the soil, damaging the plant’s roots. If there’s excess water for too long, the plants’ leaves may wilt and they may die.
Low temperatures slow down the daily growth of plants and reduce evaporation rates. Consequently, they typically require less water. Water your plants when the top inch of soil has dried out to prevent root rot. It’s crucial not to overwater, as excess water can lead to root rot.
Wet leaves can promote the development of foliar diseases. For a disease to thrive, the pathogen must be present, the environment, such as wet leaves, must be conducive, and there must be a susceptible host plant. Wet plant leaves overnight to create a perfect environment for disease development.
Excessive water intake can lead to various types of root rot diseases. Symptoms of root rot typically include discolored leaves and stunted plant growth. However, many people mistakenly attribute these symptoms to a lack of water and may apply more water, further complicating the issue. It’s crucial to recognize that plant diseases like take-all root rot, Pythium, and Rhizoctonia thrive in moist conditions and are highly aggressive pathogens. Additionally, prolonged leaf wetness can exacerbate issues such as leaf spots.
Since water is essential for good plant health, finding the right balance can be challenging. You can water your plants twice a day, ideally before 10 a.m. and around 4 p.m., but avoid watering in the evening. When watering, ensure that only as much water is provided as the plant needs. Focus on wetting the roots or stems while avoiding wetting the leaves.
Be Aware of Pests

If you bring a plant indoors, it can introduce pests into your home. Additionally, houseplants may naturally attract pests. Regardless of the cause, addressing a pest issue early is crucial to prevent it from becoming severe. Implementing preventive measures for your garden during winter is necessary. While many pests become less active in the winter, some can still pose a threat to your plants. Therefore, it’s important to remain vigilant and address houseplant pests before they become problematic.
Which pests can infest in low temperatures?

Before your plants become infested by pests, it’s important to be aware of early vigilance. This article will help you identify potential signs of an infestation and guide you on what to do if you detect them on your plants. Here are some common indoor plant pests to watch out for :
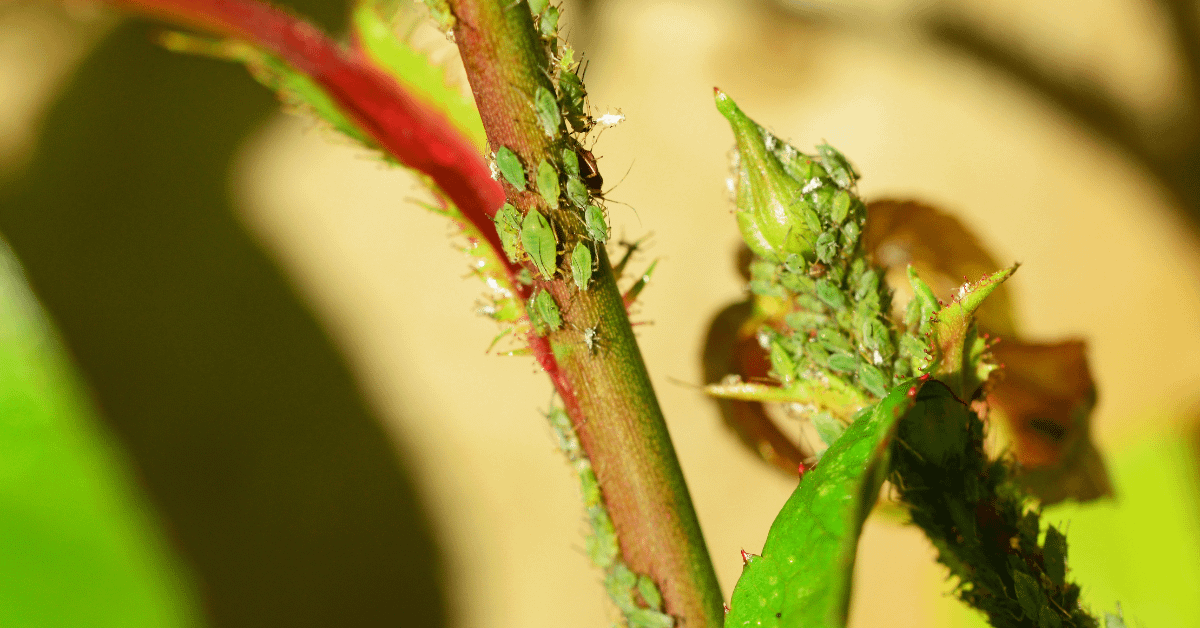
1. Aphids: Aphids, among the most common household pests, are small, soft-bodied insects. They typically appear green but can also be white, black, yellow, or pink. Aphids pose a threat to plants as they feed by sucking up sap, depriving plants of essential nutrients. They are particularly attracted to young plants. Signs of aphid infestation include yellowing or deformed leaves, stunted growth, and distorted buds, as aphids feed on plant sap. Additionally, aphids excrete a shiny, sticky, sugary substance known as honeydew.
Get Rid of Aphids on plants
Basic Method
You can physically remove aphids by hand. In this case, you can physically remove spider mites by wiping them off with your fingers or a cloth. This is the best method for immediate control of light infestations.
You can spray aphids with water or immerse the entire plant in water to remove them. To immerse aphids in water, take a container of water, flip it over, and submerge it in water at room temperature. This will help eliminate aphids. This method is particularly effective for aphid plants where spraying the leaves may not be feasible.
For better results, mix one teaspoon of dish detergent in one gallon of water to create a good solution and use it for your plants.
Use a Homemade Spray
.Peel and chop the garlic bulb and small onion.
.Place the chopped garlic, onion, and cayenne pepper in a food processor or blender.
.Process the ingredients until they form a paste-like consistency.
.Transfer the paste to a container and add 1 quart of water.
.Allow the mixture to steep for 1 hour.
.After steeping, strain the mixture through a cheesecloth to remove any solid particles.
.Add one tablespoon of liquid dish soap to the strained liquid and mix well.
.Transfer the homemade aphid spray to a spray bottle for easy application.
.Store any unused portion in the refrigerator for up to one week.
This homemade aphid spray can be an effective and natural way to control aphids on your plants.
Use neem oil
Neem oil can be used for aphid control. Neem oil is derived from the leaves of the neem tree and is completely natural. It affects the feeding ability of insects and acts as a deterrent. According to the Environmental Protection Agency, its use on edible and non-edible plants is safe.
Use Chemical Sprays
First, try a mild chemical remedy. In this case, you can use rubbing alcohol. If your plants are heavily infested and you have no other alternative, treat the infestation with a spray containing pyrethrin, imidacloprid, or pyrethroid insecticides. To minimize potential harm, opt for a low-toxicity pyrethrin-based spray. Although it can be effective, using such sprays carries a risk of damage, albeit reduced.
2. Mealybugs: Mealybugs are small, soft-bodied insects related to scale insects. They are typically recognized by their white coloration and produce a powdery, waxy secretion that is commonly referred to as mealiness. This powdery secretion serves as protection against pesticides, making it extremely difficult to combat mealybugs effectively.
Mealybugs are attracted to certain plants that provide them with the sap they need as food. They produce honeydew through their feeding process, which attracts ants and resembles the secretion of aphids. Mealybugs favor soft-stemmed plants, succulents, roses, and citrus plants.
While the white bodies of mealybugs make them easy to spot, they often hide beneath flower petals and leaves to evade detection. Check your plants for signs of stunted or distorted growth, or inspect them for early indications of a potential mealybug infestation. They reproduce slowly but can quickly multiply with offspring, so addressing a mealybug problem as soon as possible is crucial.
Get Rid of Mealybugs on Plants
Use Isopropyl Alcohol
Prepare a liquid solution with 70% isopropyl alcohol and transfer it to a spray bottle or soak a cotton ball with it. Before applying it to the entire plant, it’s essential to test it on a small area, such as a leaf, to ensure it doesn’t cause wilting due to the alcohol’s effects. When cleaning the plant, gently and gradually remove the mealybugs. Avoid using harsh rubbing motions to prevent damage to the plant. If the infestation persists, continue treatment once or twice a week. Additionally, consider introducing ladybird beetles as a natural method to control the mealybug population on your indoor plants.
Spray With Insecticidal Soap
When using insecticidal soap, it’s preferable to choose unscented and low-dose varieties to minimize potential harm to plants. If you decide to make your solution, mix one teaspoon of soap into a gallon of water. This concentration helps determine the effectiveness of the soap while reducing the risk of causing excessive harm to plants. Ensure thorough mixing of the solution before use to maximize its effectiveness.
To ensure that there are no residues left on your plants when spraying, spray on the underside as well. Apply the spray weekly or biweekly as needed. Homemade insecticidal soap and many commercial products can be used even after the day of production for edible plants, but always check the label of the product.
Use Neem Oil
To prepare neem oil, use two tablespoons of neem oil, 1 to 2 teaspoons of mild dish detergent, and 1 gallon of warm water. Mix the ingredients thoroughly to ensure that all components are well combined.
Spray neem oil on the plants in the morning or evening when beneficial insects are less active. The natural substance in neem oil affects an insect’s feeding abilities, growth, and development, and it acts as a repellent, not only harming pests but also sparing beneficial insects. According to the Environmental Protection Agency, neem oil is safe to use on vegetables, other edible plants, and ornamentals. You can repeat this process every seven to ten days.
Use Synthetic Chemical Pesticide
Always consider the use of chemical pesticides as a last resort, and use them with extreme caution. Ensure that the pesticide you are using is not harmful to humans and only targets harmful insects.
Select a specially formulated and approved pesticide for use against mealybugs. If planning to use it on household plants, ensure it is safe for indoor use. Follow the label instructions on how and when to apply the pesticide, and if the infestation persists, adhere to the pesticide label instructions for repeated application.
3. Spider Mites
Spider mites are extremely small arachnids closely related to spiders and ticks. They typically range in size from 1/60 to 1/25 of an inch and come in a wide variety of colors, including red, yellow, green, brown, and even translucent. Some species even change colors throughout the year.
These harmful organisms gather underneath the leaves and damage them by sucking out the plant sap. Some spider mites change their color and deform the leaves by injecting toxins into them. Affected leaves typically become dry, yellow, or red or develop small distorted areas. Spider mites generally cause damage by sucking out the sap from larger plants. They can harm almost all household plants. They invade various plants indoors and outdoors. They weave webs to create small shelters and colonies underneath the leaves. Therefore, if you notice small black insects on your plants, it is important to take action promptly.
Get Rid of Spider Mites on plants.

Use basic method
These damaging creatures are so small that you usually cannot see them with the naked eye. In such cases, you can take a white piece of paper and tap the leaf of the affected plant with your finger or a stick. Then, using a magnifying glass, you can see the mites on the paper. By employing this method, you can save your plants from the mites.
Additionally, please focus on the undersides of the leaves or the tips of the branches and regularly rinse them with water. This treatment should be performed consistently to prevent spider mites and their eggs from re-establishing, effectively washing them away.
Use Rubbing Alcohol
Mix rubbing alcohol with four cups of water to create a solution. Spray this solution on the leaves, stems, and flowers of your plants. Rubbing alcohol kills spider mites by dehydrating them. Before treating all the leaves, test the solution on a few leaves of your plant for a few days, as some plants may be more sensitive to rubbing alcohol than others.
Use Insecticidal oil or neem oil.
Citrus-based essential oils derived from highly refined plant oils can be extremely effective measures against mites. The active compounds in these oils suffocate the mites, preventing them from thriving. Essential oils are more likely to be from natural sources and have fewer chances of increasing pesticide resistance compared to synthetic pesticides.
Neem oil is a natural oil obtained from the neem tree. Neem oil keeps humans and most animals safe. However, it helps to destroy various insects, pests, and many other species. Neem oil contains azadirachtin, which disrupts the feeding, molting, mating, and egg-laying cycle of insects and mites.
Use Pyrethroid Pesticide
Pyrethroids are insecticides formulated by blending natural pyrethrins with other synthetic compounds to enhance the efficacy of pyrethrins. Pyrethrin itself is derived from certain species of flowers and, in its purified form, is considered a safe insecticide. However, pyrethroid insecticides are not regarded as entirely natural due to the incorporation of synthetic compounds. However, they still present a safer alternative compared to many other fully synthetic chemical pesticides. Pyrethroids are most commonly recommended for spraying on foliage to combat spider mites.
Spray With Chemical Pesticide
Various commercial chemical pesticides such as malathion, bifenthrin, cyfluthrin, and kelthane are effective at killing spruce spider mites. Whenever possible, these should be used together. They should be stored safely away from plants to avoid serious infestations and used only when other methods fail. While chemical pesticides can be toxic to both animals and humans, they should be especially carefully used on food and fruits. Always read and follow the label instructions carefully. Spider mites can quickly develop a response to natural chemical pesticides, so if you feel the need to reapply, switch from chemical to chemical in rotation.
4. Whiteflies
The whitefly is a common name representing more than 1500 species in the family Aleyrodidae, found in offices and homes alike. Depending on where you are and the type of plant affected, various species of whiteflies can infest plants. They are very small in size, resembling tiny white or wax-like flies, typically ranging from 1/10 to 1/12 inches. The complete life cycle of a species usually takes only 16 to 22 days, and reproduction occurs rapidly whenever conditions are favorable.
Whiteflies are sap-sucking insects that feed on the leaves and stems of plants. They consume plant sap for nourishment and excrete honeydew, which can promote the growth of fungal diseases and attract other pests. Honeydew secreted by whiteflies can lead to the development of sooty mold, a black fungal growth. In warm weather, whiteflies reproduce rapidly, but in cooler temperatures, their life cycle progresses more slowly.
Get Rid of Whiteflies on plants.
Take Primary step
As a primary step, you can spray water on the plants. This will dislodge whiteflies and their nymphs. Nymphs won’t move after emerging internally for a few developmental stages, so they won’t relocate after their food source runs out, and they’ll die. Additionally, you can use a damp cloth to clean the affected leaves for honeydew and mold control or spray them.
Attract natural predators
Feeding on whiteflies acts as a beneficial control by natural predators. These natural enemies include ladybugs, green lacewings, dragonflies, and parasitic wasps, among others. To attract and support these beneficial predators, create a garden habitat and plant flowers that attract hoverflies, which feed on whiteflies.
Use insecticidal soap
You can use an insecticidal soap. To make it, mix one tablespoon of castile soap with one quart of water. Apply the soap to the pests. It will clean their surface and suffocate them by closing their breathing pores. Use it in the morning or evening in cold conditions, and follow the instructions for application if necessary.
Use yellow sticky traps.
Whiteflies are sensitive to the color yellow. If any part of your home or garden is infested, yellow sticky traps can be used. Whiteflies are attracted to the yellow color of the trap and get caught in the sticky substance. This method works effectively for aphids, fungus gnats, thrips, and other pests as well. You can create your sensitive traps by applying petroleum jelly to yellow cards and placing them near your plants. While not as effective as store-bought traps, they can catch some insects and alert you to their presence.
Use Neem Oil
Neem oil has insecticidal properties and also serves as a fungicide. It is absorbed by plants, offering long-lasting protection. The Environmental Protection Agency (EPA) states that neem oil is safe to use on vegetables, food plants, and ornamental plants. Similar to insecticidal soap, neem is effective in managing whitefly populations but may not completely eradicate the issue. Several applications might be needed. This approach kills whiteflies at all life stages and helps prevent the formation of black sooty mold.
Soil and Fertilization for Your Indoor Garden in Low Temperature
Setting up an indoor garden in areas with lower temperatures presents various challenges, but creating a healthy indoor garden is possible with proper care and enriched soil and fertilizer supply. The health and growth of your garden depend on the quality of the soil and the correct supply of fertilizers. Typically, the soil and nutrient requirements of indoor plants may be lower compared to outdoor plants. To address these challenges, it is essential to manage the overall health of the soil by ensuring proper soil care, enriching the soil with nutrients, and managing fertilizer application.
CHOOSING THE RIGHT SOIL
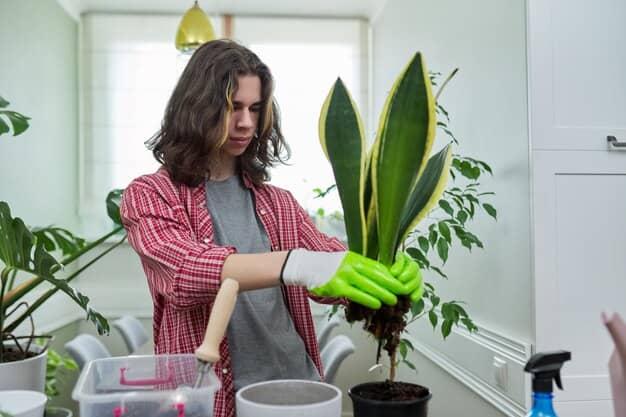
For indoor plants, it’s essential to choose a high-quality potting mix that provides excellent drainage and aeration. In this case, using garden soil is not advisable because it can be excessively heavy and may harbor the possibility of disease. The type of soil you select should be able to retain water and nutrients for the plant’s roots while also allowing for proper care of the roots. Ensure that the potting mix can absorb excess water, provide air circulation, and supply ample oxygen to the roots. For this purpose, you can create an advanced mixture for your plants by mixing peat moss, bark, perlite, sand, and vermiculite with nutritious soil. This will help your plants gather nutrients and support their proper growth. When you notice that your plants are outgrowing their pots, it’s time to transplant them into a larger container. This provides fresh soil and more space for root growth.
Fertilization Needs & Apply

Remember, plants generally grow slowly at low temperatures and require less fertilizer. In such cases, applying excess fertilizer can damage the plants and cause leaf burn. Choose a fertilizer and use it according to the recommended dosage and application instructions. Typically, fertilizing once a month during the active growth period of the plants is sufficient. In that case, you can make organic fertilizer for your plants, which will provide them with complete and necessary nutrients safely.
Fertilizer is a substance used to increase soil fertility and supply essential nutrients for plant growth. It typically provides the necessary elemental components like nitrogen, phosphorus, potassium, and other minerals crucial for plant development. There are different types of fertilizers: granular fertilizer, liquid fertilizer, and slow-release fertilizer. The application of fertilizer enriches the soil minerals in the garden, promotes healthy root development, and ensures the supply of essential nutrients for plants. Regular and proper use of fertilizer results in improved plants with high-quality flowers, fruits, and beautiful garden landscapes.
Which Fertilizer is Right for You

Nitrogen (N): Nitrogen is an essential element used to improve soil fertility and promote plant growth. It is crucial for the development of plants and can be found in healthy soil. It provides plants with the energy they need for growth and for producing fruits and vegetables. A lack of nitrogen can lead to yellowing of plant leaves. Nitrogen deficiency can hinder the primary structure of protoplasm in plant cells. Protoplasm serves as the basic substance of cell life, contributing to the initiation of flowers, rapid shoot growth, the delicate health of flowers, and the qualitative growth of fruits. Additionally, it acts as a catalyst for other mineral substances.
Phosphorus (P): Phosphorus is a crucial nutrient that plays a vital role in flower formation and fruit and seed production. It is an essential element for growers because flower formation is a primary indicator of a healthy fruit set. Phosphorus is also crucial for promoting root growth in plants. The root is the foundation of the plant, and having a healthy, well-developed root system is essential to ensure a healthy plant. Phosphorus enhances the strength of plant roots and strengthens them for winter while also improving plant resilience against diseases.
Potassium (K): Potassium is an essential element for plant growth, aiding in disease resistance and general development. It is particularly crucial for food crops. Potassium, also known as potash, helps plants utilize water and resist stress, contributing to fruit and seed production. If the soil lacks sufficient potassium, it can hinder plant growth and lead to other symptomatic issues. Applying potassium as part of a fertilizer program can help overcome these deficiencies and address other target problems. Using potassium as a component of balanced fertilizer is common in gardens. Potassium promotes the development of healthy green landscapes.
Organic Fertilizer vs. Chemical Fertilizer


Different types of fertilizers can be used in gardens. At this time, you can purchase chemical fertilizers from your local garden center. Chemical fertilizers are typically available in the market and are primarily prepared for the nutrition of your plants. Using chemical fertilizers is easy and ensures a rapid supply of necessary nutrients for plants. However, there may be some disadvantages to their use. Their usage may limit the dynamic range of nutrients. Long-term use of these fertilizers may reduce soil fertility and its natural ability.
Nowadays, many gardeners are showing interest in using organic fertilizers. Natural fertilizers are derived from organic sources such as animals, plants, and minerals. However, organic fertilizers work slowly in the soil. Soil microorganisms require time to break down the organic materials to obtain nitrogen, phosphorus, potassium, and other minerals. Among the types of organic fertilizers are bone meal, blood meal, manure, compost tea, and compost. Organic fertilizers may be more expensive compared to chemical alternatives, but they gradually enhance soil quality over time.
Overall, determining the most effective fertilizer for your garden depends on the specific needs of your plants, the condition of the soil, garden monitoring, and personal preferences. Experimenting with different types of fertilizers and observing how your plants respond will help you identify the best fertilizer for achieving optimal results in your garden.

